The intention of this project is to showcase a custom C++ utility for Arnold while displaying creativity and artistry.
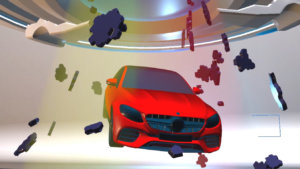
The final result below was achieved by procedurally modeling and animating wind mobiles and spatially distributing them in a scene to create an appealing look. This first step was achieved in Houdini. Later on the resulting animated geometry was cached as an Alembic and imported into Maya to light and texture using Arnold and the custom C++ utility. In this case the main utility used for this project, Side Mask, identifies the front or rear facing normals of a polygon to modify its shading properties.
First step I took was to model the three designs of wind mobiles (or wind chimes?) in Houdini. There were two main advantages for doing them in this software:
- Once I had the design, I could easily tweak it as much as I needed without having to remodel it.
- I could have a lot of moving parts per element and animate them procedurally to then replicate the effect throughout the scene.
Thanks to this I had absolute control over the amount of elements, their layout and the overall speed of the moving parts.
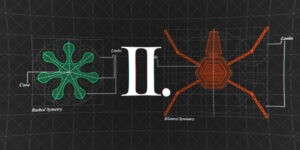
A demonstration of the parametric nature of the three main designs
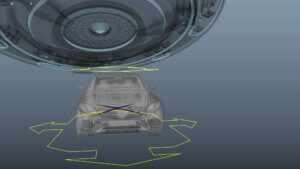
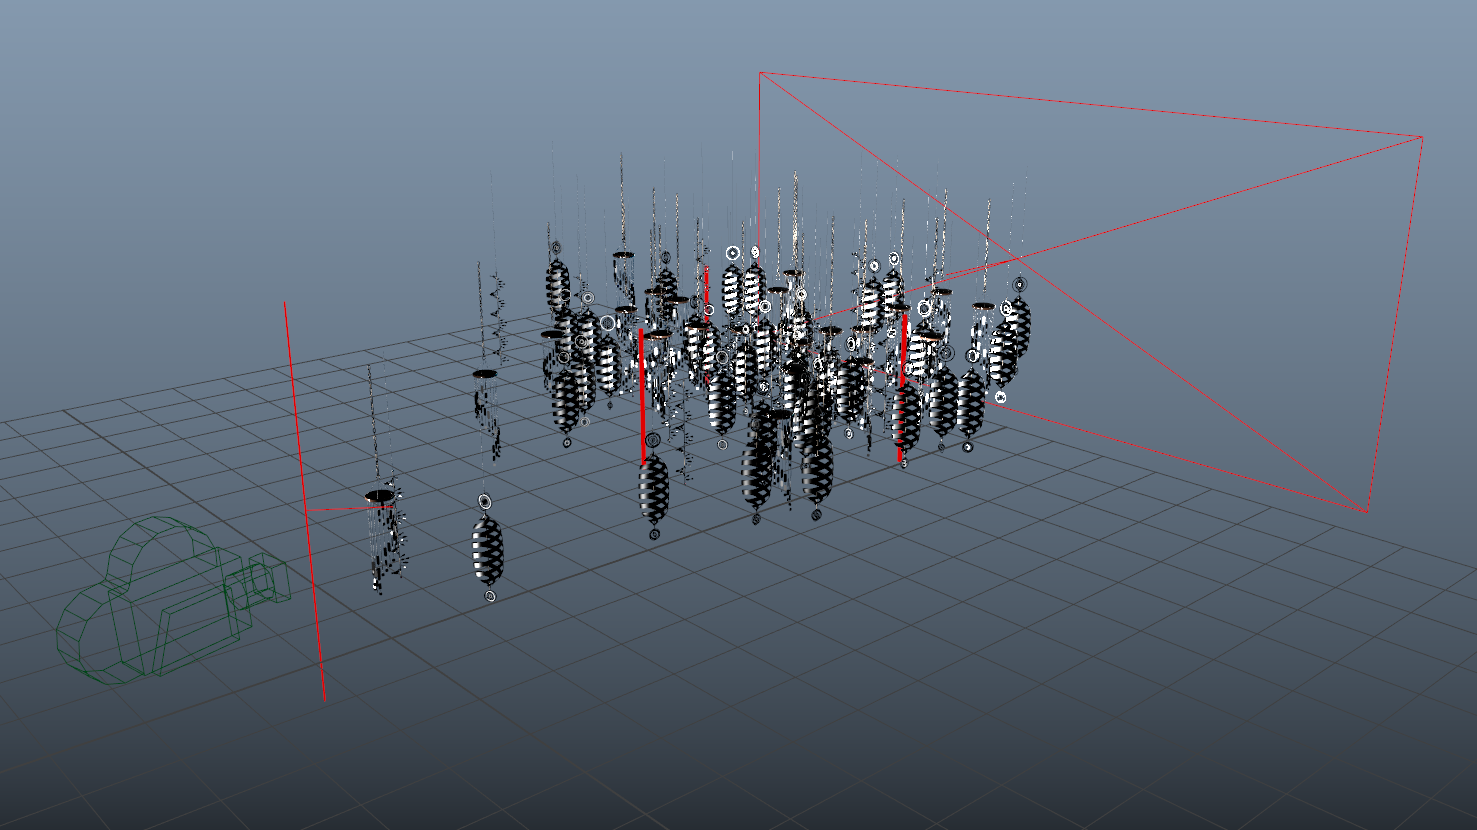
I procedurally laid out a scene with multiple copies of the 3 variations of the mobiles in the background. I also placed 3 mobiles in the front to showcase the 3 main designs. Each of the objects in the scene have unique individual rotations thanks to the power of proceduralism and parametrization.
Following, I added a camera that I key-framed with a vertical pan to display the main mobile in the center.
The 3 designs are at the front. DoF Emphasizes Separation with the Background
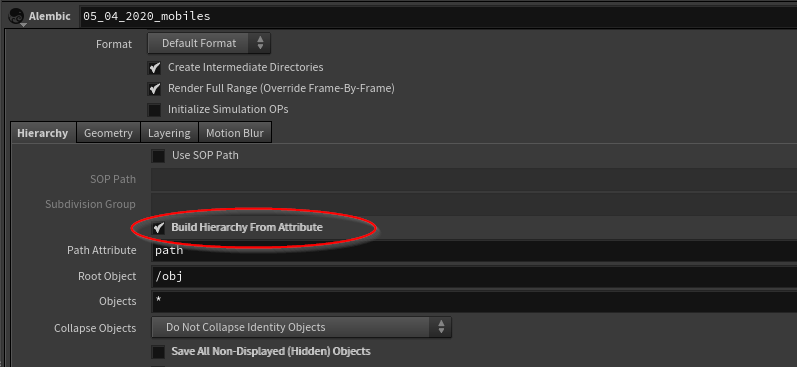
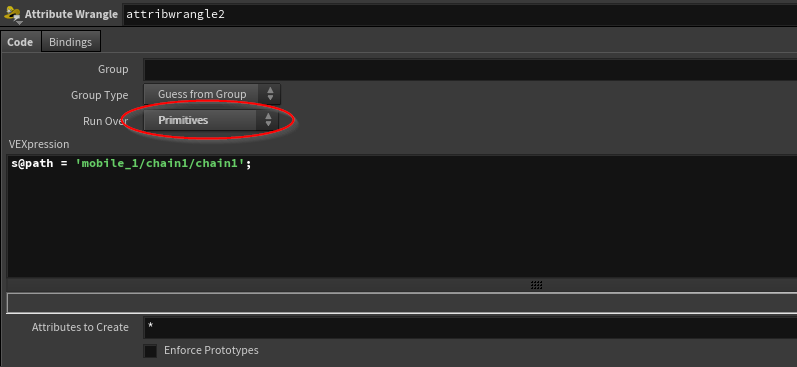
Once I was satisfied with the general layout of the scene. I cached it out as an Alembic file to be loaded into Maya. There’s a super useful feature in the Alembic ROP (see images below). With it it is possible to build a hierarchy in the Maya Outliner in order to have separate geometry nodes instead of a monolihic Alembic node. This facilitates assigning the shaders to the elements of the scene.
The way you do it is by adding a simple line of VEX in a Primitive Wrangle at the end of the stream of each part of the design in the Network Editor (see images below).
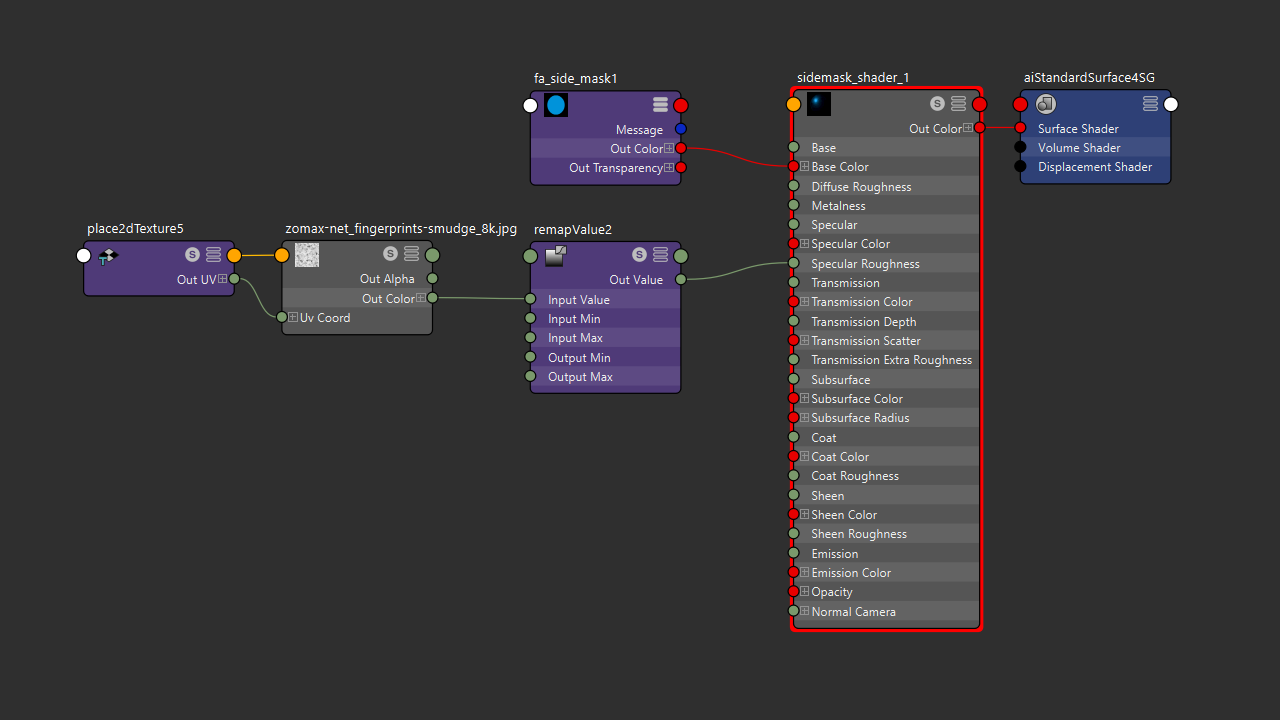
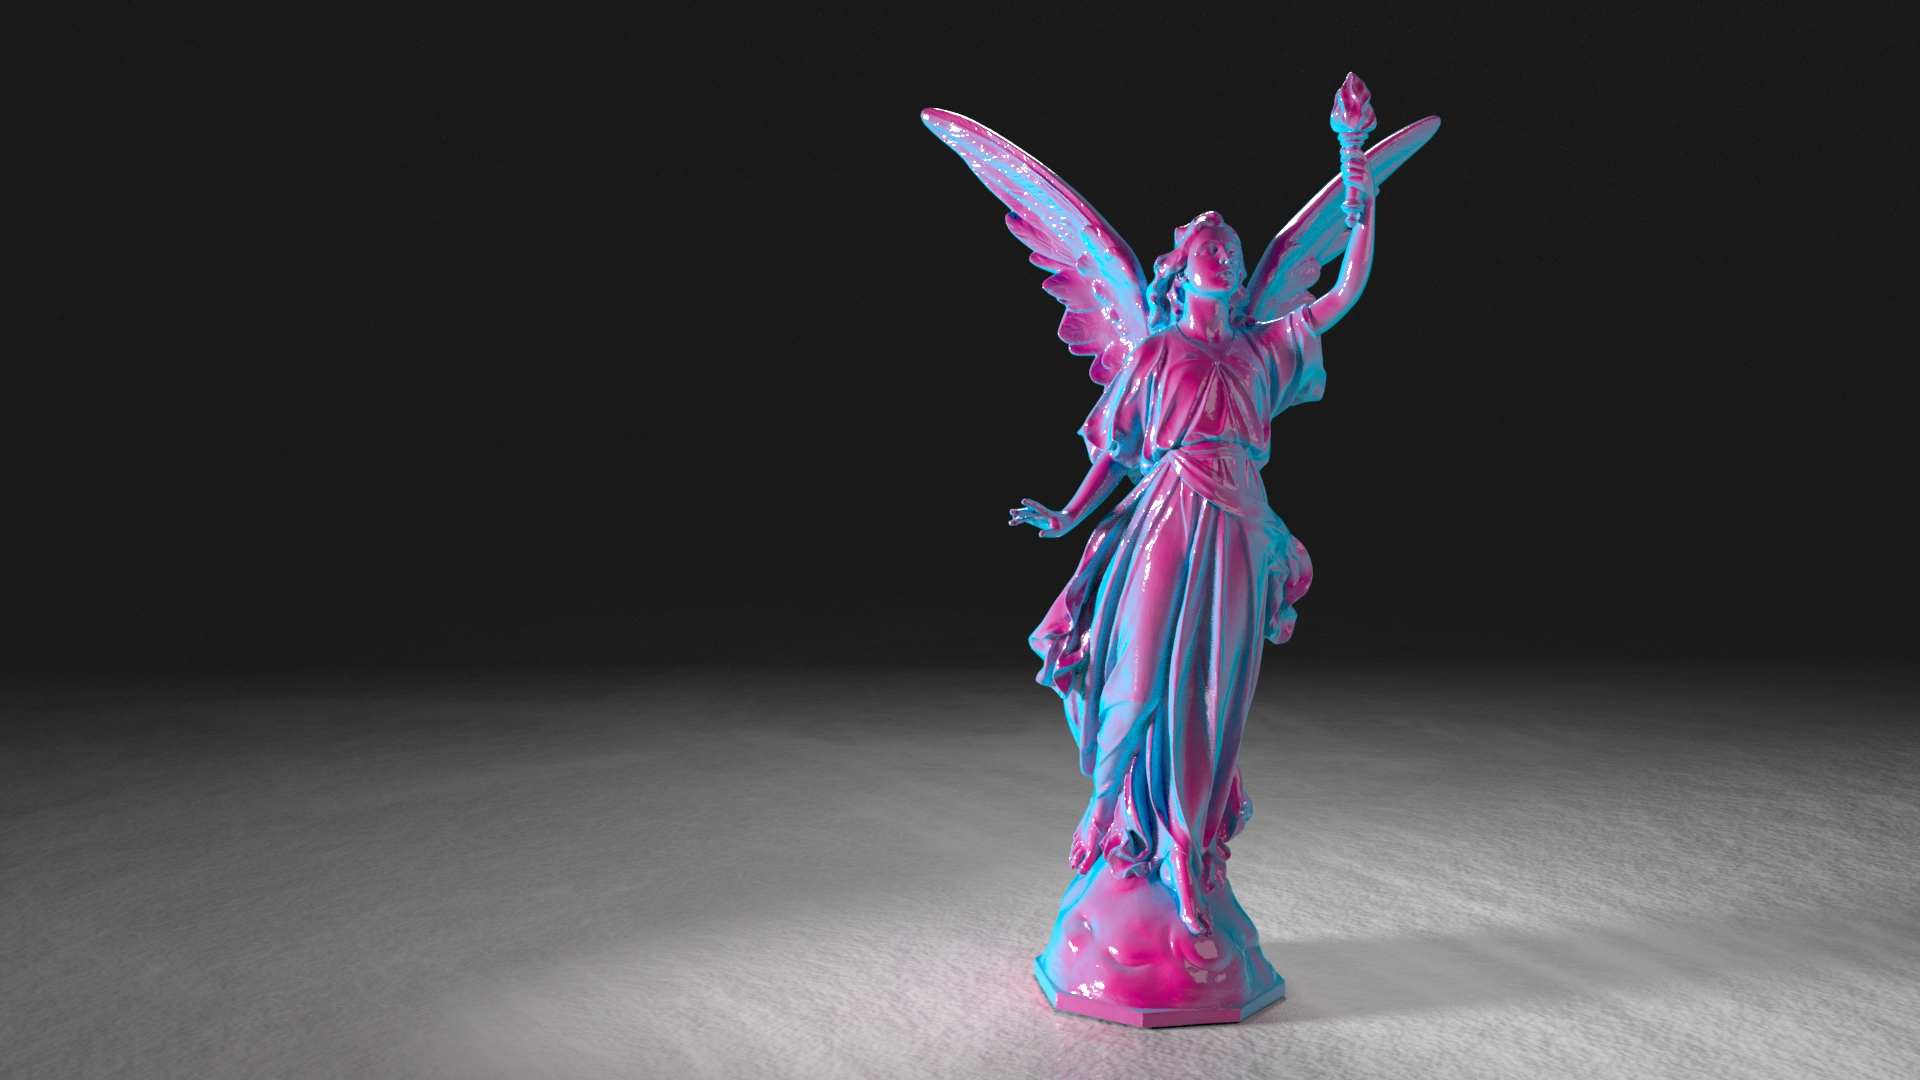
Once in Maya, as I stated before, assigning the shaders was quite easy. I placed some lights and once I was happy with the lighting and tweaked the materials to a pleasant point, I made use of the C++ side mask utility by plugging the Out Color to the Base Color of the main 3 ai Standard Surface shaders I created for the chimes of the wind mobiles.
What is the Side Mask Utility Anyway?
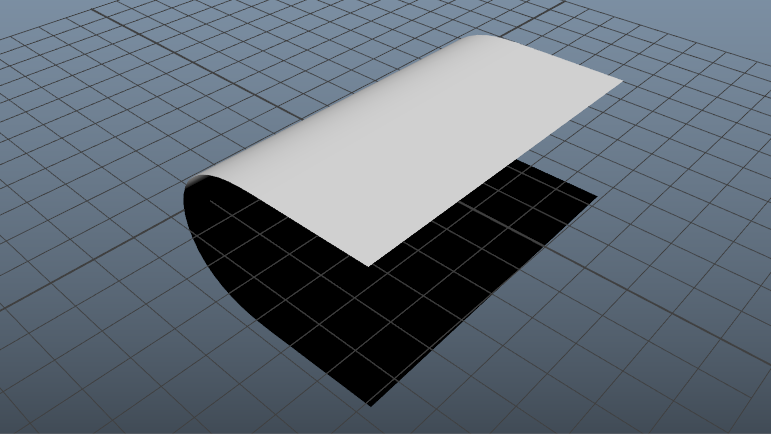
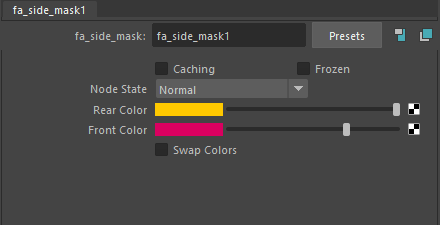
This is simply a C++ script that by the use of normal comparison and a simple if statement, determines if the normal of a polygon is facing the viewer or not. Once that is detected, it is easy to assign a color to the front facing facing and another to the rear facing one. It is needles to say that this node can be plugged into any other input to change specularity, opacity, emission, etc. Below, 3 images showing the utility within Maya.
In order to create utilities, it is necessary to have the Arnold SDK package in the computer and a text editor to write and compile the actual script. For this class, our professor, Malcolm Kesson, provides his own custom program called Cutter. It has a lot of built in functionalities that allow to have quick access to the included libraries from the Arnold SDK as well as many shortcuts. Our professor has a lengthy explanation about how to setup these tools here.
The C++ script that generates the Side Mask utility for Arnold.
SideMask.cpp
					/* Determines which color to use on the front / rear facing normals. */
#include <ai.h>
#include <cstring>

AI_SHADER_NODE_EXPORT_METHODS(SampleMethods);

namespace {
    enum paramIndex { k_rear_color, k_front_color, k_swap_colors };
    };

node_parameters {
    AiParameterRGB("rearColor", 0.7f, 0.7f, 0);
    AiParameterRGB("frontColor", 0.7f, 0, 0);
    AiParameterBool("swap_colors", 0);

    }

shader_evaluate {
    bool swap = AiShaderEvalParamBool(k_swap_colors);
    AtRGB rearColor = AiShaderEvalParamRGB(k_rear_color);
    AtRGB frontColor = AiShaderEvalParamRGB(k_front_color);


    //We are shading a front face...
    if(sg->N == sg->Nf)
        sg->out.RGB() = (swap) ? rearColor : frontColor;
    else //shading a rear face
        sg->out.RGB() = (swap) ? frontColor : rearColor;
    }

node_loader {
    if (i > 0)
        return false;
    node->methods        = SampleMethods;
    node->output_type    = AI_TYPE_RGB;
    node->name           = "fa_side_mask";
    node->node_type      = AI_NODE_SHADER;
    strcpy(node->version, AI_VERSION);
    return true;
    }

// The remaining macros can be left "empty"
node_initialize { }
node_update { }
node_finish { }
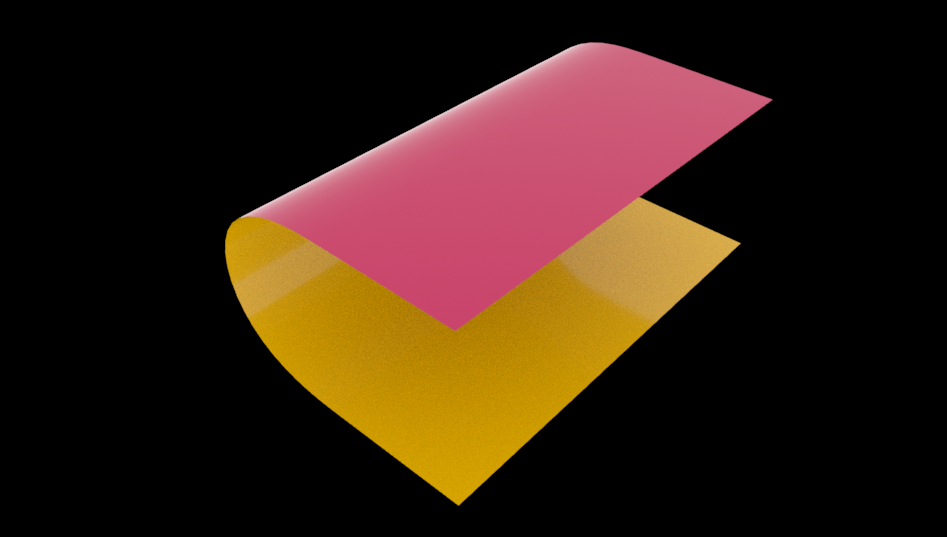
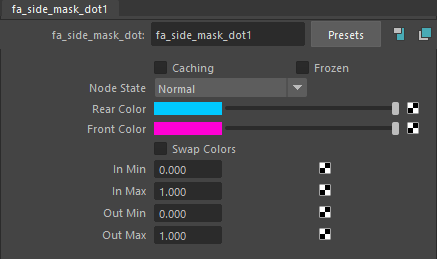
The version used for the project is the barebones Side Mask utility. But to meet the requirements for the assignment and to test my capabilities I made an additional script called Side Mask Dot. This version makes use of a dot product between the normalized ray origin (camera position), and the face-forward shading normal as a blending criterion between the two colors. Additionally I created a remap functionality to be able to alter the blending factor input and output, maximum and minimum values (courtesy of Kristy and Will!) . The visible result of this utility is a fresnel-like distribution of the two colors.
The more complex version of the Side Mask utility.
SideMaskDot.cpp
					/* Determines which color to use on the front / rear facing normals. */
#include <ai.h>
#include <cstring>

AI_SHADER_NODE_EXPORT_METHODS(SampleMethods);

AtRGB mix(AtRGB  c1, AtRGB  c2, float alpha){
    return c1 * (1.0 - alpha) + c2 *alpha;
    };

namespace {
    enum paramIndex { k_rear_color, k_front_color,
                                    k_swap_colors,
                                    k_inMin,
                                    k_inMax,
                                    k_outMin,
                                    k_outMax};
    };

node_parameters {
    AiParameterRGB("rearColor", 0.7f, 0.7f, 0);
    AiParameterRGB("frontColor", 0.7f, 0, 0);
    AiParameterBool("swap_colors", 0);
    AiParameterFlt("inMin", 0);
    AiParameterFlt("inMax", 1);
    AiParameterFlt("outMin", 0);
    AiParameterFlt("outMax", 1);

    }

shader_evaluate {
    bool swap = AiShaderEvalParamBool(k_swap_colors);
    AtRGB rearColor = AiShaderEvalParamRGB(k_rear_color);
    AtRGB frontColor = AiShaderEvalParamRGB(k_front_color);

    float inMin = AiShaderEvalParamFlt(k_inMin);
    float inMax = AiShaderEvalParamFlt(k_inMax);
    float outMin = AiShaderEvalParamFlt(k_outMin);
    float outMax = AiShaderEvalParamFlt(k_outMax);

    AtVector normV1 = AiV3Normalize(sg->Ro);
    AtVector normV2 = AiV3Normalize(sg->Nf);

    float dot = AiV3Dot(normV1,normV2);
    //low2 + (value - low1) * (high2 - low2) / (high1 - low1)

    float blend = outMin + (dot-inMin)*(outMax-outMin)/(inMax-inMin);

    if(swap == 0){
    sg->out.RGB() = mix(rearColor, frontColor, blend);}
    else sg->out.RGB() = mix(frontColor, rearColor, blend);

    }

node_loader {
    if (i > 0)
        return false;
    node->methods        = SampleMethods;
    node->output_type    = AI_TYPE_RGB;
    node->name           = "fa_side_mask_dot";
    node->node_type      = AI_NODE_SHADER;
    strcpy(node->version, AI_VERSION);
    return true;
    }

// The remaining macros can be left "empty"
node_initialize { }
node_update { }
node_finish { }
A Bit of Compositing
After rendering my scene in passes I put them together in Nuke to be able to have depth of field and tweak a few aspects here and there.
Conclusions
The ability to write custom shaders and utilities for Arnold can be a great technical skill to have, not only for shading or lighting, but also to solve complex pipeline problems during a production. The main advantage I see with this is the nature of the code being written in C++, which is an extremely fast programming language, adding efficiency to the mix.