With the creature designs and HDAs at a good stage of development, I was able to move on to implementing the motion. For this, I started with a few tests based on something I learned from Matt Estela’s take on Sasa Budimir’s Hair Walker. But sought to adapt the method to the current creature implementation.
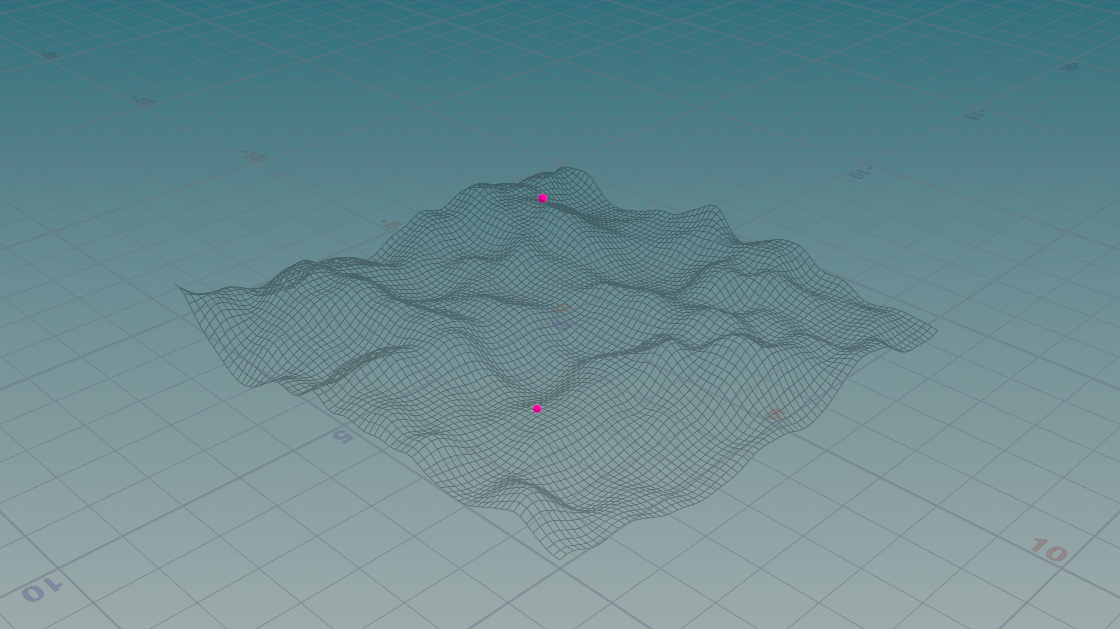
I got started by scattering two points on a temporary terrain where the creature is gonna walk on.


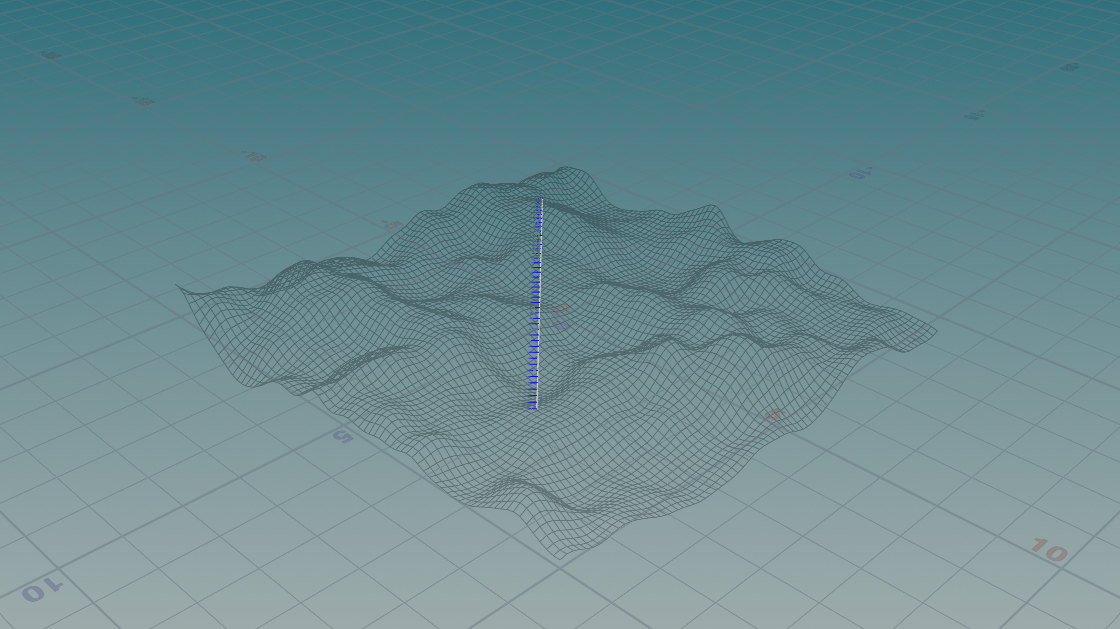

To move a point along the line, Matt Estela uses Attribute interpolate. What happens here is that you tell the point that it “belongs” to the primitive number zero. In this case, the line is one primitive with that number. and what you take advantage of here is the implicit uvs that the line has. These being a gradient that goes from 0 to 1, from the first point to the last. So you can tell the point to adopt the interpolated position at a specific point sample of these uvs by manually writing its corresponding uv attribute.
Now, the goal is to have user input, while keeping manual animation to a minimum. What if you want to have the creature walk along the path but at different speeds? Perhaps when going uphill it decelerates, and when going downhill it speeds up. Now that poses a more technical challenge.
Initially, I needed to identify the verticality of the line. This was calculated pretty easily through the use of Poly Frame.
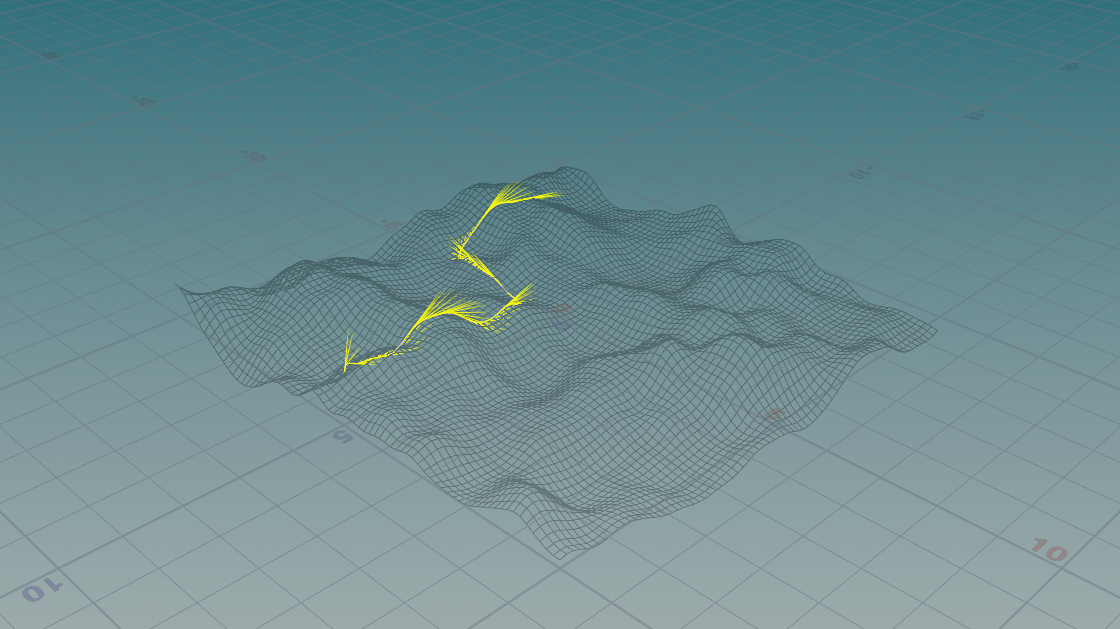
For this particular step, directionality is not important, only the Y component is. So I zeroed out the X and Z components.
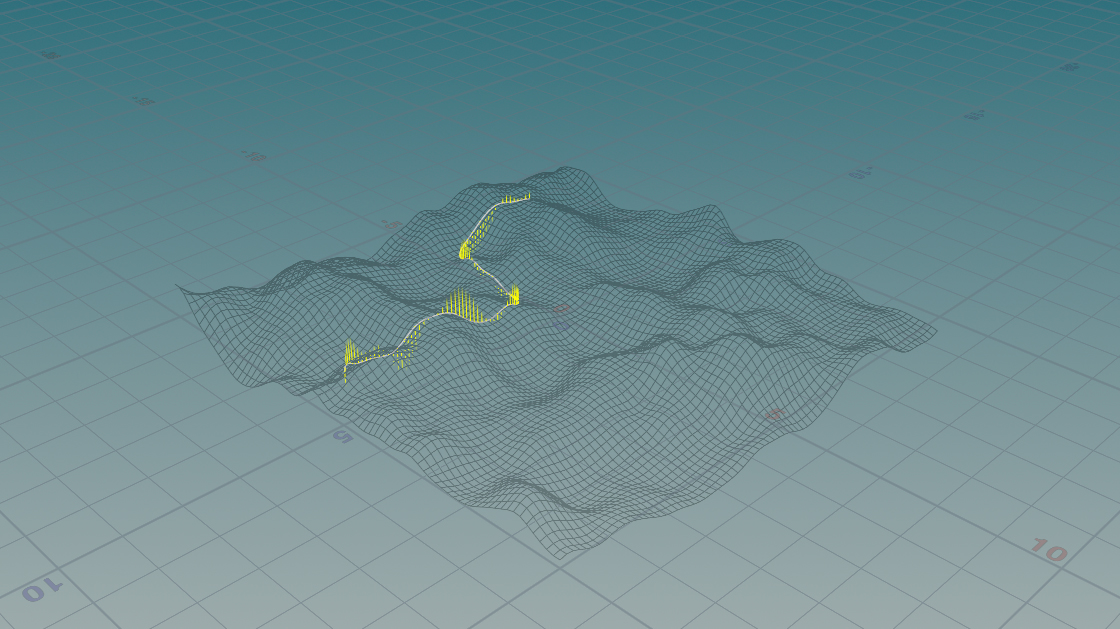
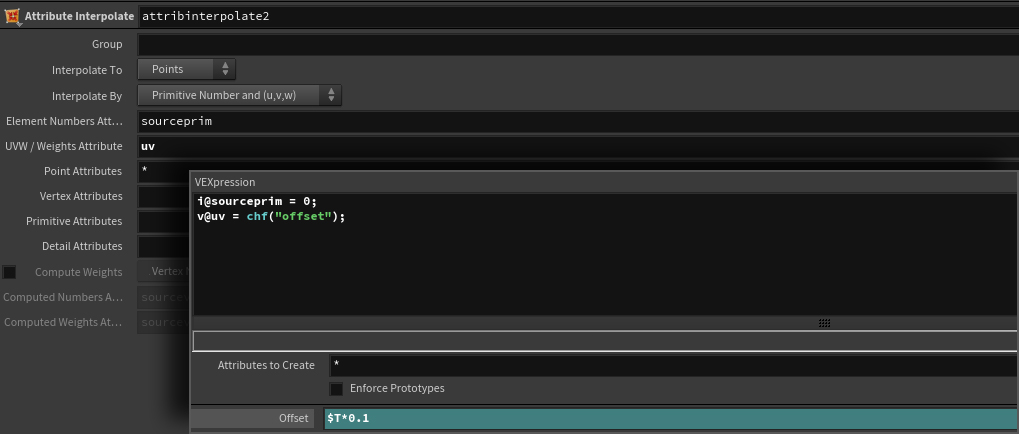
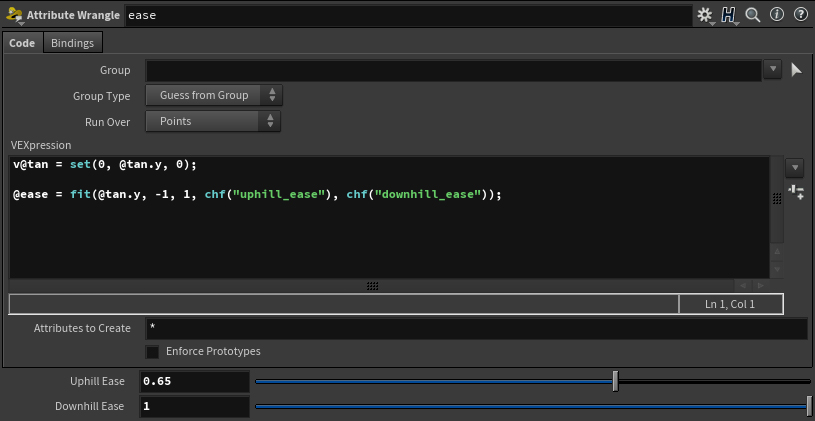
Using the uphill/downhill information available, I created an @ease attribute in a Wrangle to control the difficulty through parameters.
Next, I used the ease attribute to distort the @uv attribute.
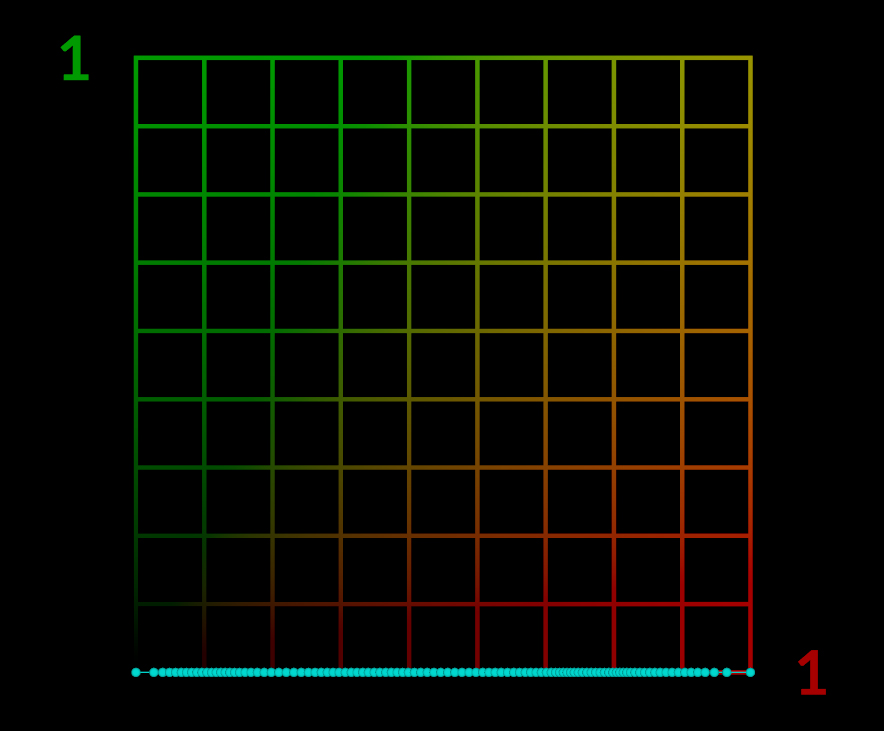
Regular 0 to 1 uvs Versus Distorted uvs
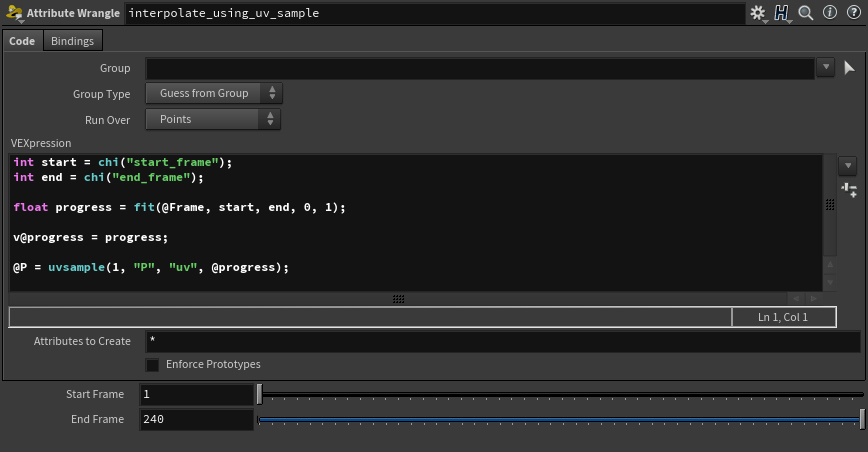
Unfortunately, Attribute Interpolate doesn’t play nice with this since it reads the implicit uvs and not the newly created ones (at least to the best of my knowledge). This required me to find a different way to make the movement happen. The solution was to use the uvsample() function to read the position attribute from the line along a previously specified time step using an arbitrary custom attribute (@progress).
Point Moving With Variable Speed
There are still some artifacts that need to be polished away, but in general, this is a good start to begin implementing motion on the creatures.
This concludes this lengthy post about getting the A to B motion working. The next steps will account for moving legs and actual steps. These will feed the KineFX rig embedded in both types of creatures in order to have them actually walking on the terrain. Until next time!