Tracking and layout for the second shot was recently finished. This means I received an FBX file with the position of the camera and objects of our scene. After tweaking the new procedural system for the asphalt, it was time to implement the setups in the new provided scene.
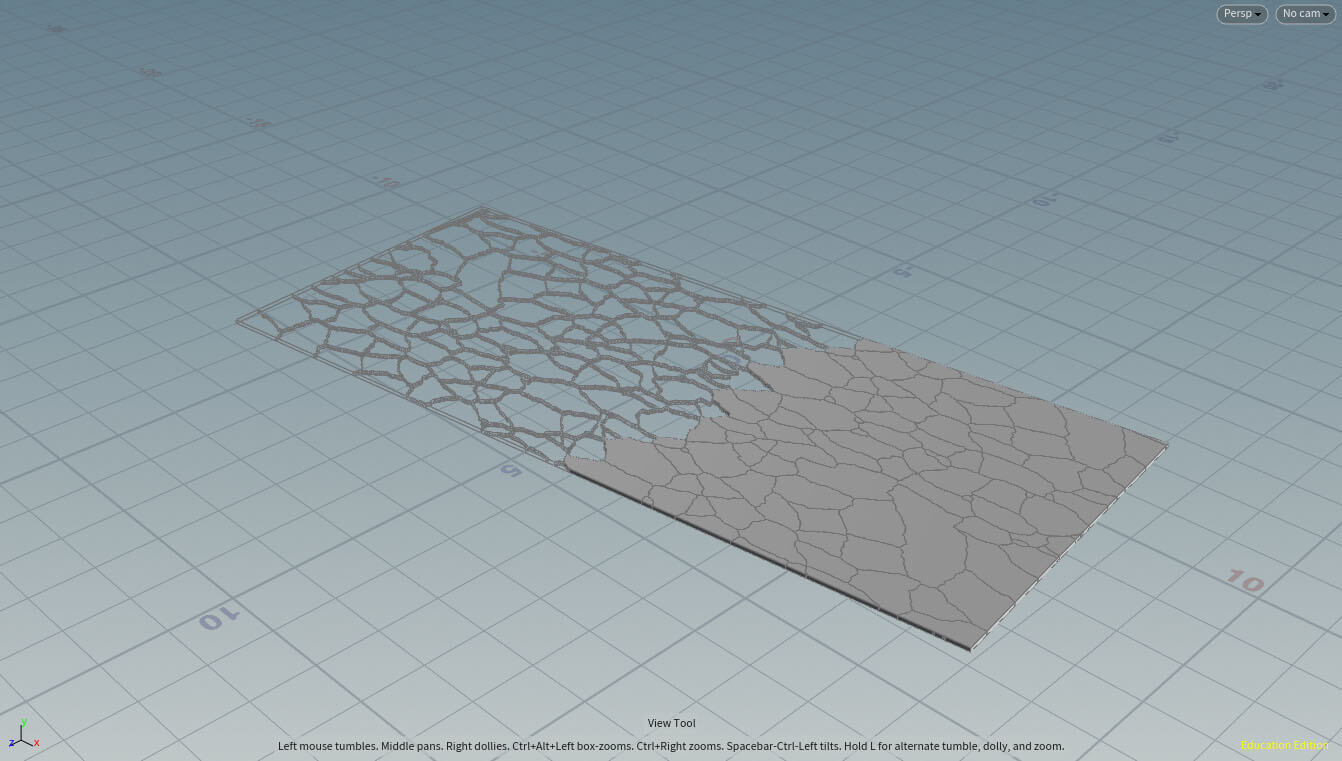
I started using the geometry provided to block out the section of the road that was going to be torn.
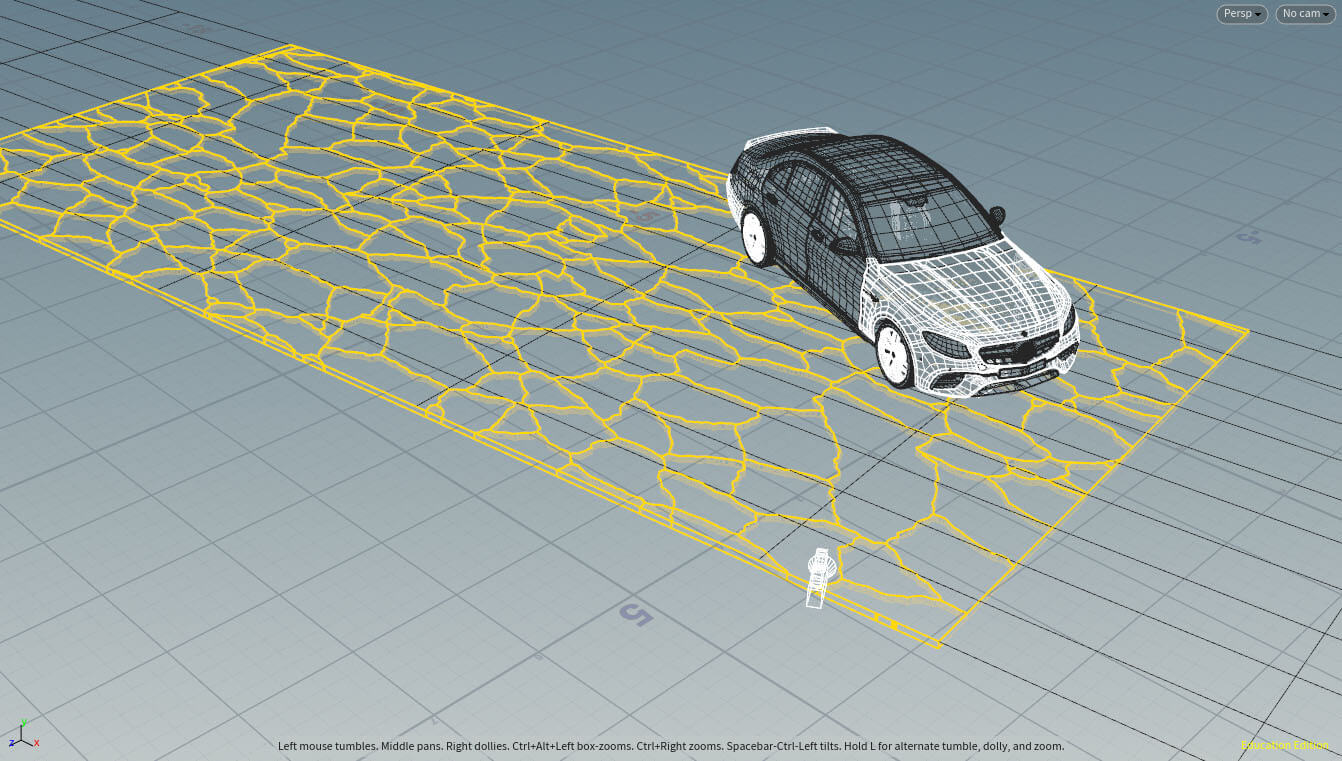
Then, by the use of the camera, I grouped out the pieces that wouldn’t be needed in the scene and excluded from the simulation by deleting them. These were merged back with the procedurally lifted pieces.
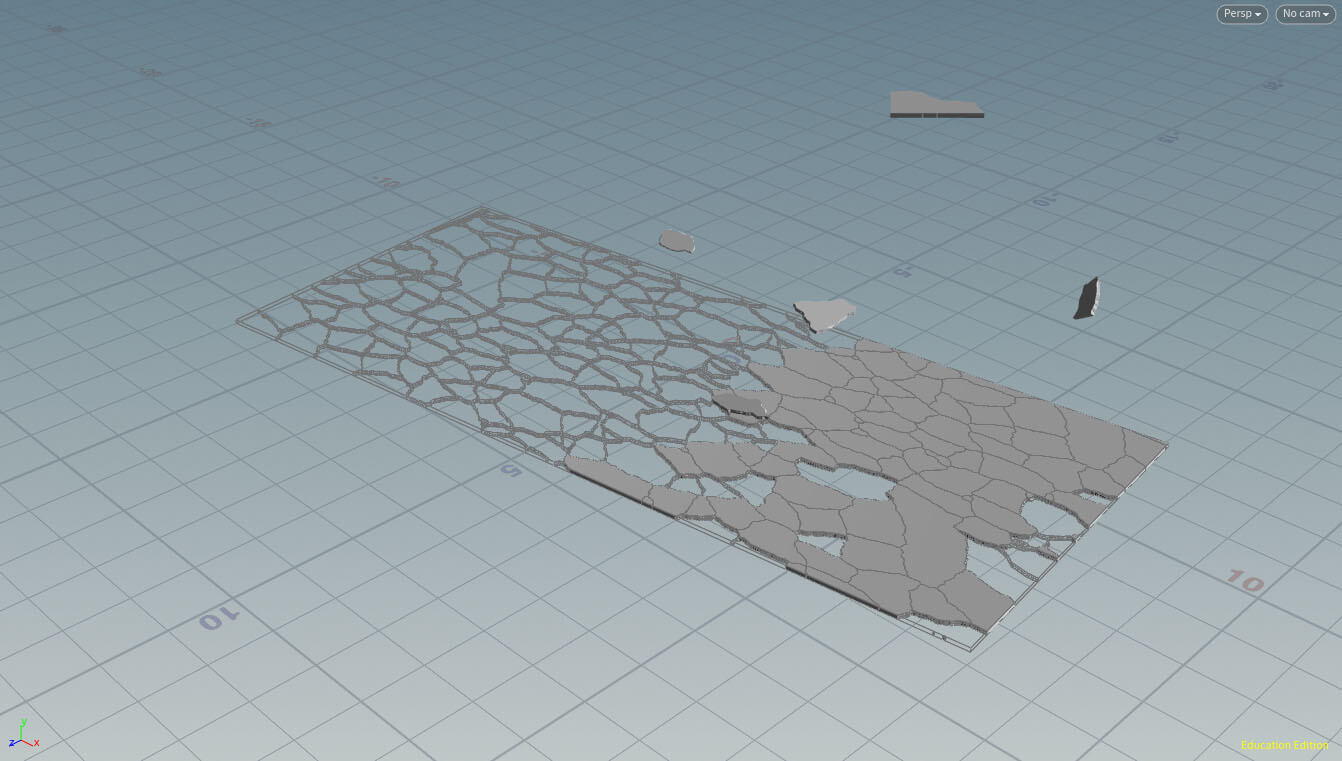
The actual application of the setup, as I mentioned before, is the same overall as what I developed after getting rid of the old dynamic system. But with a few changes. One of them was the ability to have the pieces tear off. Kind of like popping out of the ground due to the extreme imaginary force exerted by the tractor beam. This result was achieved by the use of a ramp that remapped the vertical position of the piece.

					// transtation stuff

float heightIncrement = chf("height_increment");
float heightThreshold = chf("height_threshold");
float fitPosy = @P.y/heightThreshold;
float xzDeclineRamp = chramp("X_Z_Decline_Ramp", fitPosY);
float speed = chramp("speed", fitPosY);

// set stuff for rotation

vector rotX = set(1,0,6);
vector rotY = set(0,1,6);
vector rotZ = set(0,0,1);

float anglex = 0;
float angleY = 0;
float angleZ = 0;

// declare a matrix for rotation

matrix3 m = dihedral({0,1,0},rotY);

// rotation controtler

float rotMult = chf("rotation_multiplier");

// activate motion

if(@opinputi_active ==1){
    @active=1;

    // height control

    @P.y += heightIncrement * fit01(speed,0,heightThreshold);

    // x & z control
    @heightdiff = @P.y - @opinput2_P.y;

    if(@P.y > 0.2 || @heightdiff > 0){
        @P.x *= xzDeclineRamp;
        @P.z *= xzDeclineRamp;
    }
    else // -------------------------- This is not working
    {
        @P.x = @P.x;
        @P.z = @P.z;

        // rotations if statement
        /*
        --------------------------
            if(@P.y <O.2 &&@ active ==1){
                jitter something
            }
        --------------------------
        */

        if(@p.y >= 0.2){
            anglex = (rand(@ptnum+1)-0.5) * (@P.y-0.2)*@Time * rotMult;
            angleY = (rand(@ptnum) -@.5) * (@P.y-8.2) *@Time * rotMult;
            angleZ = (rand(@ptnum-12)-0.5) * (@P.y-@.2)*@Time * rotMult;

            rotate(m, angleX, rotyX);
            rotate(m, angleY, rotyY);
            rotate(m, angleZ, rotZ);
        }
    }
}
// apply rotation
setprimintrinsic(0, 'transform', @ptnum, m,'set');
Once I felt the pieces had a proper motion, by the use of debris source, I created a POP simulation to the breakage of the asphalt add detail to the edges of the torn pieces and road. I added the pieces as animated RBD objects to collided with the particles as well as drag for air resistance and a little bit of turbulence through POP Force.
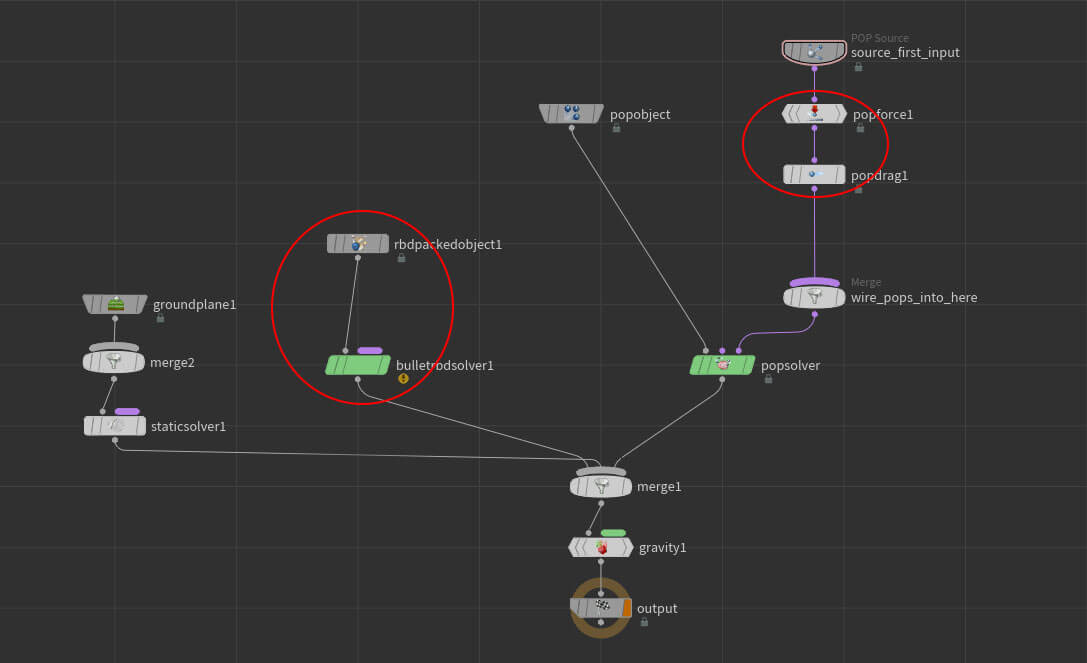
Integrated with the POP simulation, this is how it looks:
Parallel to the asphalt simulation. I added a supplementary particle simulation to have an additional layer of debris. This also adds to the continuity between the two shots, since in the first one, forces are picking up already, so once we cut to the second shot, you can see the extent of the effect in a wider view.
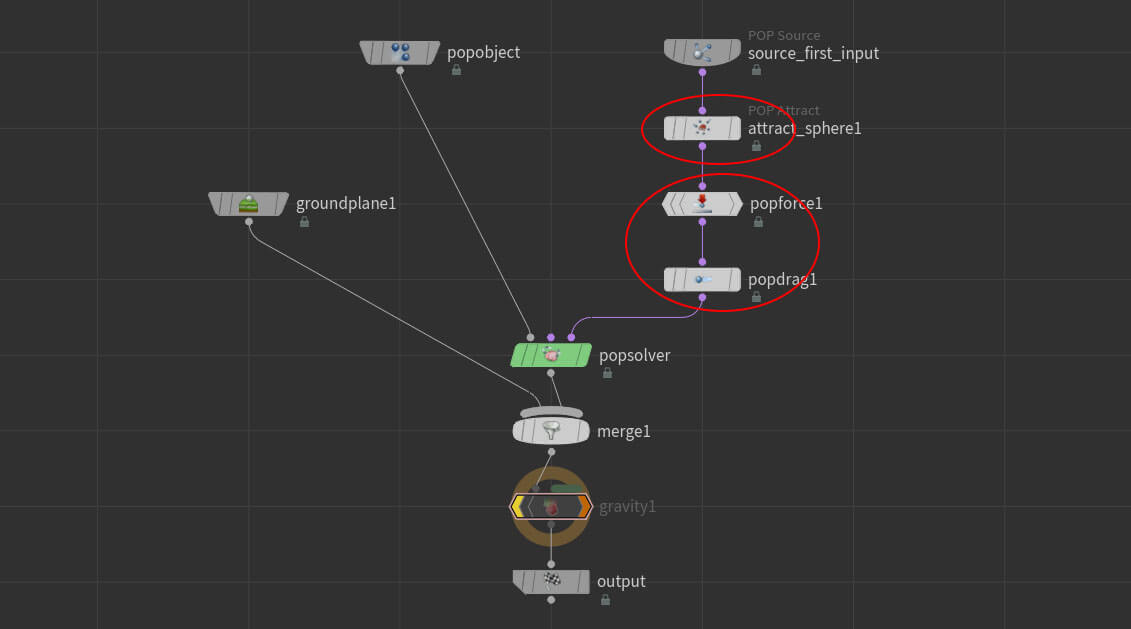
The setup is farly simple. It uses the ground as its source and by the use of POP Attract I have the particles lift up towards the position of the UFO. I also use POP force and POP drag to create turbulence and air resistance.
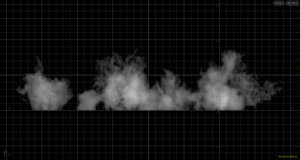
This is the resulting motion.
Once I layered up the 3 simulations, this is what I get.
There are some things that I wasn’t able to implement for this week. I wanted to have some rumbling effect on the asphalt chunks, but this is something I will have to further research and develop to apply it.
Additionally to this, we are still trying to find the best way to handle volumes since the whole look development is being done in Maya and not directly in Houdini. We need to add fine dust through the implementation of a smoke simulation (which is something I am developing right now, but again, could not implement yet for this post).
This is all for now. Until next time.