During the previous days I started to meet technical obstacles, as expected, after all this is something far from what I’m used to doing in Houdini, and also sort of one of the goals of this project. What goal, you ask? well, to challenge myself a bit a lot.
The hunter type creature has been at a fairly decent stage of development, which took me to take the step of packaging it as a Houdini Digital Asset. In part, to start moving along further down the development of this thesis with the goal of starting to be able to actually placing the creatures in their habitat. But also because if I separate the process into separate HDAs I can give the user more control over the configuration of the system as well as simplifying each stage of the tool(s). This way each node would represent an individual creature that the user can place by hand as well as edit, instead of having one monolithic node that controls all creatures of one specific type (also, it’s more fun to place nodes! it adds an extra level of interactivity to the system 😁).
At the same time, in order for all this to work, I set up two major things:
- In the houdini.env file in “C:\Users\User\Documents\houdini18.5”, I set up a custom variable to unify the work under $THESIS. This step is very easy to set up as well as extremely useful since it allows to consolidate all paths in the project under (A bit of housekeeping that will save some headaches and speed up the work in the long run). To achieve this, open up the .env file and variable like this:
THESIS = F:/_SCAD_Academics/999_Thesis
- Also in the “C:\Users\User\Documents\houdini18.5” folder there’s a jump.pref file. If it’s absent that means that you don’t have custom shortcuts on your “Open File” window, but it can be manually created. It doesn’t have to be generated from the Houdini interface. In my case I already had it so I just opened it and added the following line:
$THESIS/
Now I can easily access my custom thesis folder as well.
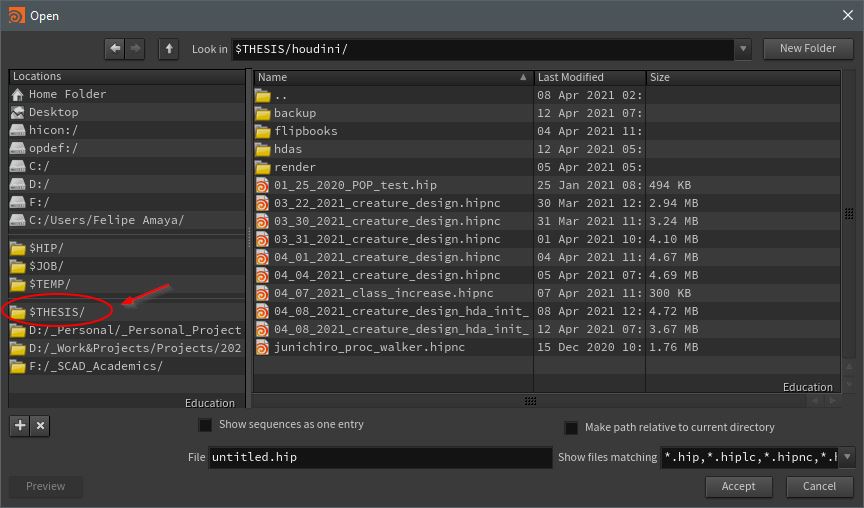
$THESIS variable visible as a shortcut
Another housekeeping step I took also included modifying the .env file. This time to have Houdini load the HDAs automatically from a custom folder within $THESIS, in this case I added an additional line in the file:
THESIS_HDAs = $THESIS/houdini/hdas
HOUDINI_OTLSCAN_PATH = “$OTL_SCAN_PATH;$THESIS_HDAs;&”
This way Houdini looks for HDAs within the custom folder I created specifically for this project.
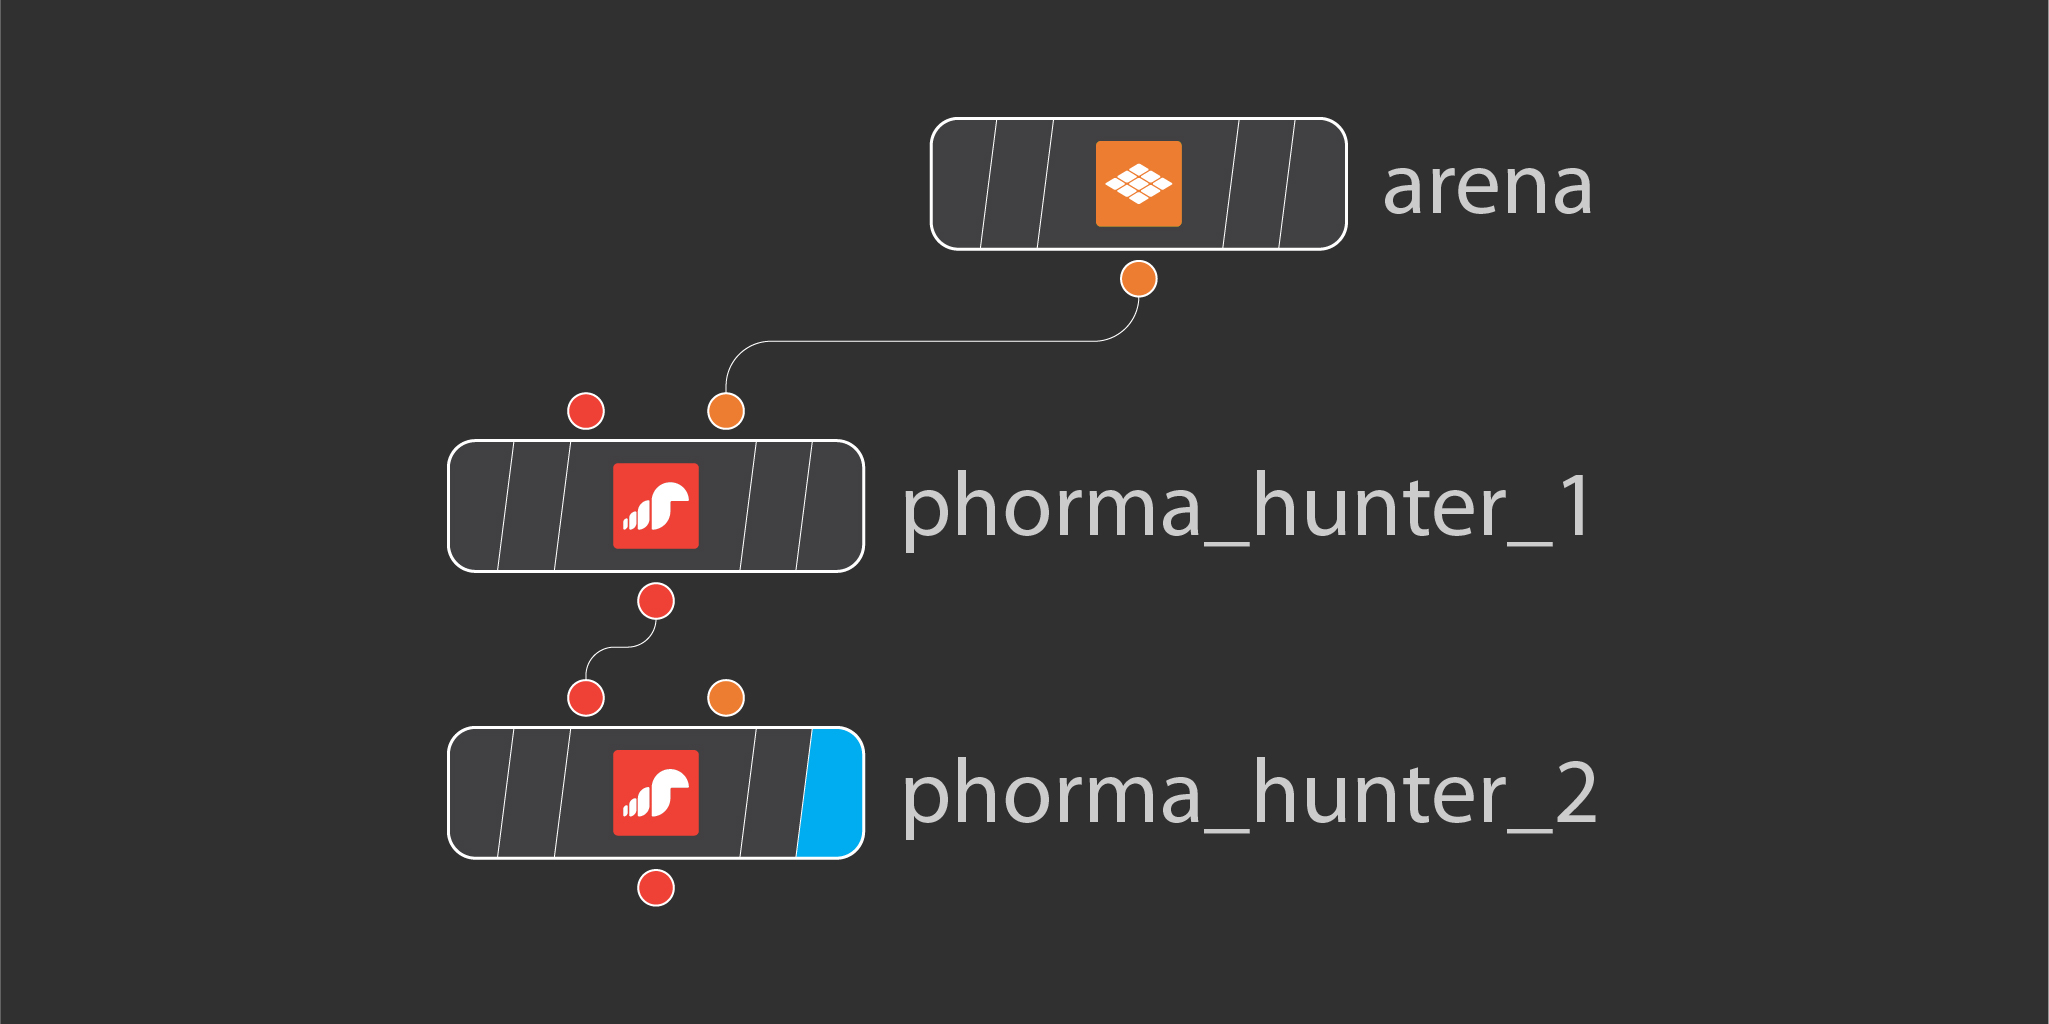
With housekeeping finished, I needed to find a way to be able to place the hunter on the habitat. I developed a fairly simple system in which I could connect Hunter SOPs one after the other and place them on a grid. The way this was achieved was by keeping track of a unique attribute per element (hunter) that would increase by one integer each time a new element would be added, while simultaneously a point would be generated on the grid with the same integer number. Said point would represent the position where the element would be placed. I built a successful prototype over the weekend

Ineffective Method for Influence
After a bit of a frustrating time off of the project problem solving, I realized that I need to build the system in order of influence. So instead of copying the creaturess to the surface, the surface needs to be fed into the creature HDA to affect the KineFX rig for foot planting as well as positioning.
Successful Method for Influence
With the concept proven, I added my HDAs to my custom folder and started testing.
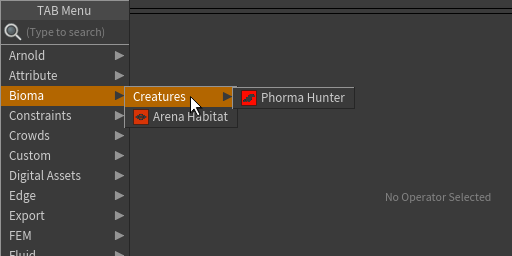
I also discovered how to put the HDAs in a custom section of the TAB menu. I am using the names I used during my thesis proposal for organization purposes:
- Bioma
- Phorma (creatures)
- Arena (Habitat)
- Phasma (Behavior)
Next, a demonstration of the succesful stackable system: